We are all game designers at heart - but many of us might be a little daunted to actually start designing a game. In this exercise we are going to design a game in literally 5 mins and demonstrate just how straight forward it is to design a game.
Take note: We only said we would design a game -- we didn't say we would design a good or bad game. A good game design is often created by starting with an idea and then iterating it until we are satisfied with the design.
In this exercise we are going to create a mock up of a "Race to the Goal" style board game. Think of a classic board game like Chutes and Ladders, CandyLand or The Game of Life, etc. The core experience for this type of a game is to be the first one to reach the end in a turn by turn progression race. The core loop is a single turn where you roll a die and move X number of spaces and potentially receive an action from the new space you land on.
Step 1: Creating a Storyline
The first step in the design process is to create a quick theme or storyline for the game. Who do you want to race towards what goal? In the above example of Chutes and Ladders, you are a kid racing through a bunch of ladders and slides to get to the end. In the Game of Life you are racing across common life experiences to create your life story.
For this exercise - don't get too bogged down on creating the best theme or storyline. Instead - keep it simple. Maybe your are building a car, building up wealth or simply trying to make it across town.
At this point - we should also make some decisions about how many people should be playing. Let's not worry too much about this and just decide to make this game functional for 2-4 players. In future iterations as you add more complexity or skill based elements, the number of players may (or may not) have more significance.
For this example, lets use a storyline of someone driving across town
Step 2: Creating the Game Board
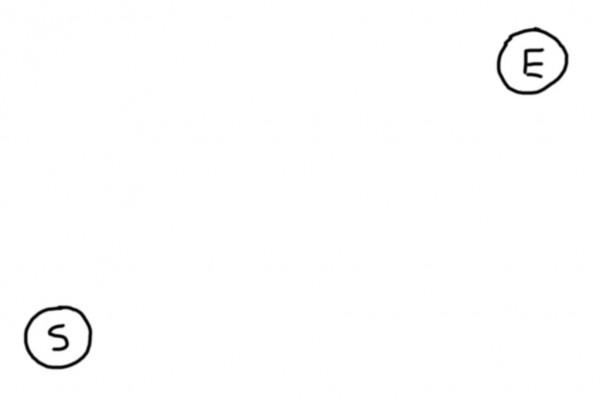
To start physically designing this game, grab a single piece of plain white paper (preferably with no lines). Put it on your desk and turn it so that it is landscaped (11 in wide x 8.5 in tall). In the bottom left corner draw a small circle the size of a quarter and write the word "start" inside the circle. In the top right corner draw another circle the same size and write the word "end" inside the circle.

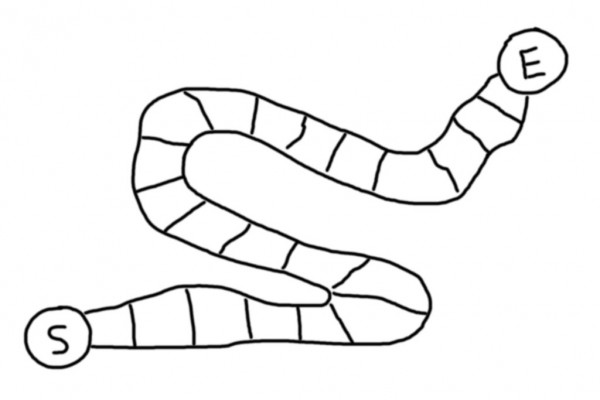
Next draw a line from your "Start" circle to your "End" circle. The line can be straight or it can have some squiggles in. The line can even cross over itself, but for now, would advise to just keep it simple with a few wide curves, etc. Once the line is drawn, draw boxes along the line, one right next to another. Create each box so that it can fit a coin inside of it, like a penny or a quarter. Hopefully you should have more than 15 boxes, but if you don't - no worries.

For our example of driving across town, we could replace the Start and End spots with something related to our storyline. Maybe our character is driving from Work to Home, etc. Feel free to adapt to your own storyline.
Step 3: Creating the Core Loop
Our next step is to determine how the game characters will move between squares. In the above examples, they were all chance based. They used a die, a spinning wheel or a deck of cards to dictate how many spaces a user should move across the board. For now, let's follow the chance based model - and to keep it simple, we will use a die. This means our character can move between 1-6 spaces during each turn. If our board has 25 spaces, this means that a player will win the game somewhere between 5-25 turns. 5 turns if the user rolls all 5's and 6's, 25 turns if the user rolls all 1's.
In future iterations of the game creation model, feel free to try out different versions of this step. If you want a unique number of options for moves (instead of 6), a spinning wheel or a deck of cards can help customize the exact number of options available. If you want to do weighted probabilities, a spinning wheel with different sized wedges can help achieve that. If you want to add skill based moves, or unique move styles, a deck of cards can help add more depth into the definition of what a single move can achieve. For example a card that says move forward 3 spaces or move to the next blue space, etc.
Step 4: Add Challenge / Conflict
You can choose to skip this step and simply have your players take turns running to the end. However - that's not a very fun or compelling game. It is easy to add a few elements of challenge or conflict and add some depth to your design. Don't be scared by this step. Games need conflict in some form or fashion.
In a simple race to the end style game there are lots of ways to add conflict. Let's explore a few. We could:
- Make players go faster or slower
- Make players change position, moving forward or backward on the board.
- Add obstacles that cause players to be delayed across the progression.
- Add boosts that enable players to skip portions of the board.
- Make players loose a turn or receive an extra turn.
This is just a small sampling of custom conflicts that we can add into our game. We now need to decide how they should be relayed to the player. If you are using a deck of cards, you could have these conflicts be conveyed to the player via the deck of cards as they draw them. If you are using a die to move players across the board, you could assign these conflicts to specific spots on the board. You could also have certain spaces that then draw from a deck of conflict cards when landed upon. An example of this are the community chest and chance cards from monopoly.
To keep things simple, we will create a couple of conflict items and assign them to random spaces on the board. have fun with these conflict items and associate them with your narrative. For our example let's use the following:
- Flat Tire, skip a turn
- Free Gas, take a free turn
- Construction Detour, Move back 2 spaces
- Shortcut discovered, Move forward 2 spaces
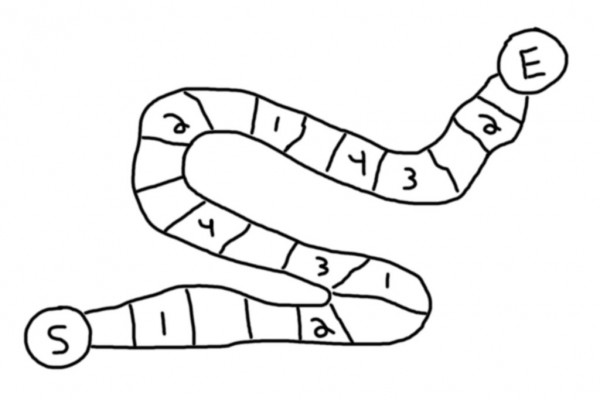
Since our board is small and we are using paper, just write down these conflict actions off to the side or on another sheet of paper. Assign each conflict a number (or symbol) and then place the numbers or symbols randomly on the various spots across the game board.

You can reuse your conflict spaces if you like. In our example here we have 4 defined and reuse them a couple of times. Would recommend not filling every single space on the board however as that can make progression very sporadic and challenging.
Step 5: Play the Game
Believe it or not - but your game is now designed! You are now an official game designer!
Now let's try playing the game. We never came up with game pieces that represent the players. You can use, well, pretty much anything. Different kinds of coins work really well or small little trinkets.
Place your token on the board in the starting position. Take turns rolling the die and moving the number of spots indicated across the board. If you land on a space with a conflict on it, take the prescribed action defined.
That's it! Congratulations on designing and playing your very first Race to the End game!
Step 6: Iterate and Improve
Now that you have your game designed, you can now improve it. After you play it a couple of times, what did you like or dislike? Ask yourself some of the following questions:
- Was the game too short? If so, make the game board bigger and add more spaces.
- Did you like the theme? If not, adjust elements of the storyline so that the characters, tokens and conflict square gel together more.
- Was the game too easy? If so, try to add more compelling conflict spaces that can add depth to the game.
- Was the game too confusing? If so, you may have conflict spaces that don't connect well with the storyline. You may also have conflict spaces that have confusing instructions. Adjust the conflicts spaces as needed to fine tune the game.
- Did the game breakdown - or prevent a player from progressing? If so, you may have conflict spaces that don't work and need to be moved or changed. For example, you can't have a conflict square on the first space of the board that forces you to go back 3 spaces. You can have a conflict square on the first space of the board that moves you forward 3 spaces, etc.
The purpose of this exercise is to demonstrate how straight forward it is to create a game. Anyone can truly be a game designer. Often we think designing a game is too hard and simply give up before even starting.
As you get more familiar designing simple games, you will notice patterns between different game types. For example, a vast major of games in the public have elements of progression, elements of conflict, etc. Start simple with your designs and iterate upon them to make them better and better.


